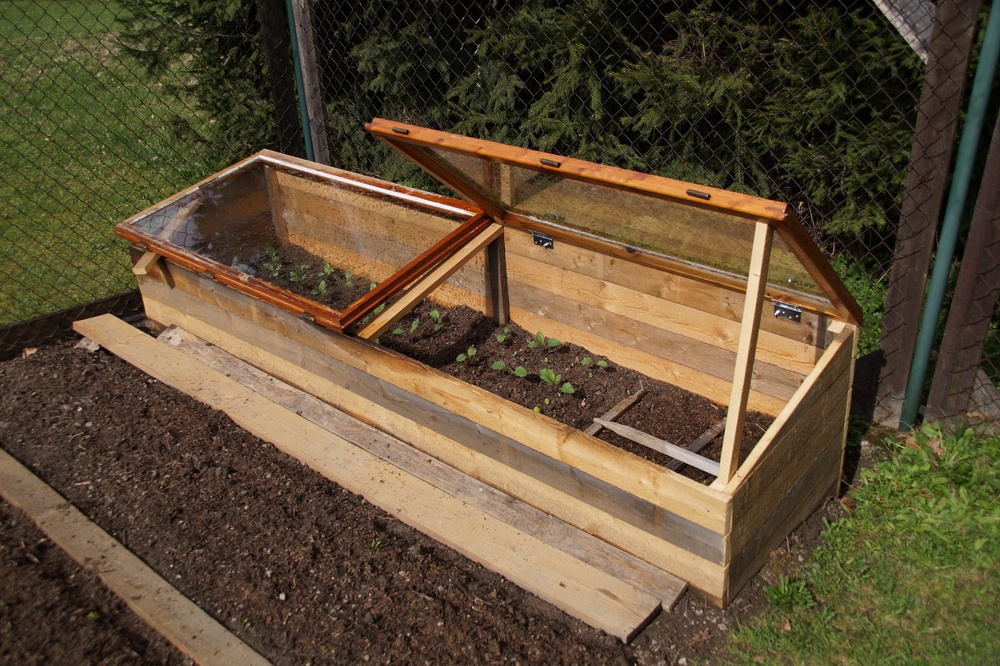
DIY Cold Frame for Winter Gardening Success: Extend Your Growing Season
Hey there, green thumbs! You know how much I love squeezing every last drop of sunshine out of the year. That's why I'm super excited to share my DIY cold frame secrets with you. These little greenhouses are a game-changer for extending your growing season, letting you enjoy fresh veggies even when the frost is nipping at your heels.
Think of a cold frame as a mini greenhouse, a simple structure that traps warmth from the sun and protects your plants from the elements. They’re a super budget-friendly way to start seeds early in the spring, grow cool-weather crops through the fall and even overwinter some hardy plants.
Why You Need a Cold Frame
Let's get real, winter can be a real bummer for gardeners. But with a cold frame, you can bid farewell to those "winter blahs" and keep your green thumb going strong.
- Earlier Starts: Imagine enjoying fresh lettuce in February! With a cold frame, you can start seeds weeks earlier than you would outdoors, giving your seedlings a head start.
- Extended Harvest: Those cool-weather veggies like kale, spinach, and chard can keep producing long after the first frost. A cold frame helps them stay happy and healthy even when temperatures dip.
- Overwintering: Protect your tender perennials from the harshness of winter. Pop them into a cold frame for a cozy hibernation and they'll emerge strong and ready to bloom in the spring.
- Budget-Friendly: Cold frames are surprisingly affordable to build, especially if you repurpose materials you already have. You can create your own for a fraction of the cost of a fancy greenhouse.
Building Your Very Own Cold Frame
Now for the fun part! You can build a cold frame from scratch or get creative with repurposed materials. Let's explore some common DIY methods:
The Classic Wood Frame
This is the traditional cold frame design. Here's what you'll need:
- Wood for the frame: Use pressure-treated lumber for durability and to prevent rot.
- Glazing: Choose polycarbonate or glass for the top. Polycarbonate is more impact-resistant, but glass provides better light transmission.
- Hinges: To open and close the lid.
- Fasteners: Screws or nails to assemble the frame.
- Weatherproofing: Silicone sealant to prevent leaks.
Measure out your desired dimensions, cut the wood, and assemble the frame. Attach the glazing, hinges, and sealant. And voilà , your classic cold frame is ready!
Repurposed Wonders
Who says cold frames have to be fancy? Get resourceful and use what you already have!
- Window Cold Frame: An old window can be turned into a charming cold frame. Simply build a frame to hold it, attaching the window with hinges.
- Plastic Storage Bins: Large, clear storage bins can be transformed into cold frames. Cut an opening in the lid and add a piece of polycarbonate or glass to create a mini greenhouse.
- Old Doors: Give that dusty old door a second life! Prop it up against a wall, facing south for maximum sunshine, and you've got a DIY cold frame.
Essential Cold Frame Accessories
To make your cold frame even more effective, consider these additions:
- Thermometer: Monitor the temperature inside your cold frame to ensure your plants are comfortable.
- Ventilation: Add a vent to the lid for proper air circulation, preventing moisture buildup.
- Shading: On scorching summer days, use a shade cloth to protect your plants from excessive heat.
- Watering System: Consider setting up a drip irrigation system for easy watering.
Cold Frame Gardening Tips
Now that your cold frame is ready, let's talk about the fun part â€" growing! Here are some helpful tips for success:
- Choose the Right Spot: Position your cold frame in a sunny location, facing south to maximize sunlight.
- Prepare the Soil: Use high-quality potting mix or garden soil enriched with compost.
- Water Wisely: Water your plants regularly, checking for dryness.
- Ventilate Regularly: Open the lid of your cold frame on warm days to allow for fresh air circulation.
- Hardening Off: Before you transplant your seedlings outdoors, gradually acclimate them to the cooler temperatures by opening the lid for longer periods.
What to Grow in Your Cold Frame
The possibilities are endless! Here are some of the best cold frame crops:
- Cool-Season Vegetables: Lettuce, spinach, kale, chard, radishes, carrots, turnips, beets, and peas.
- Herbs: Parsley, cilantro, chives, rosemary, thyme, and mint.
- Flowers: Pansies, violas, calendula, and snapdragons.
- Early Starters: Tomatoes, peppers, cucumbers, and squash.
Enjoy the Rewards
Building and using a cold frame is a rewarding experience. It’s a wonderful way to connect with nature, stretch your growing season, and enjoy fresh, homegrown food year-round. So get out there, embrace your inner green thumb, and start building your own little greenhouse haven!
0 comments:
Post a Comment